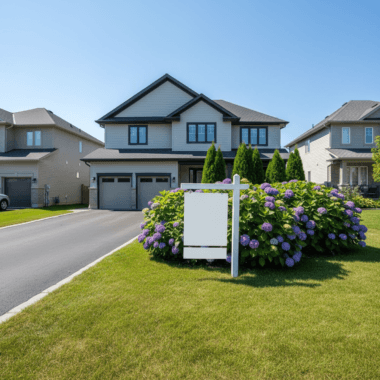


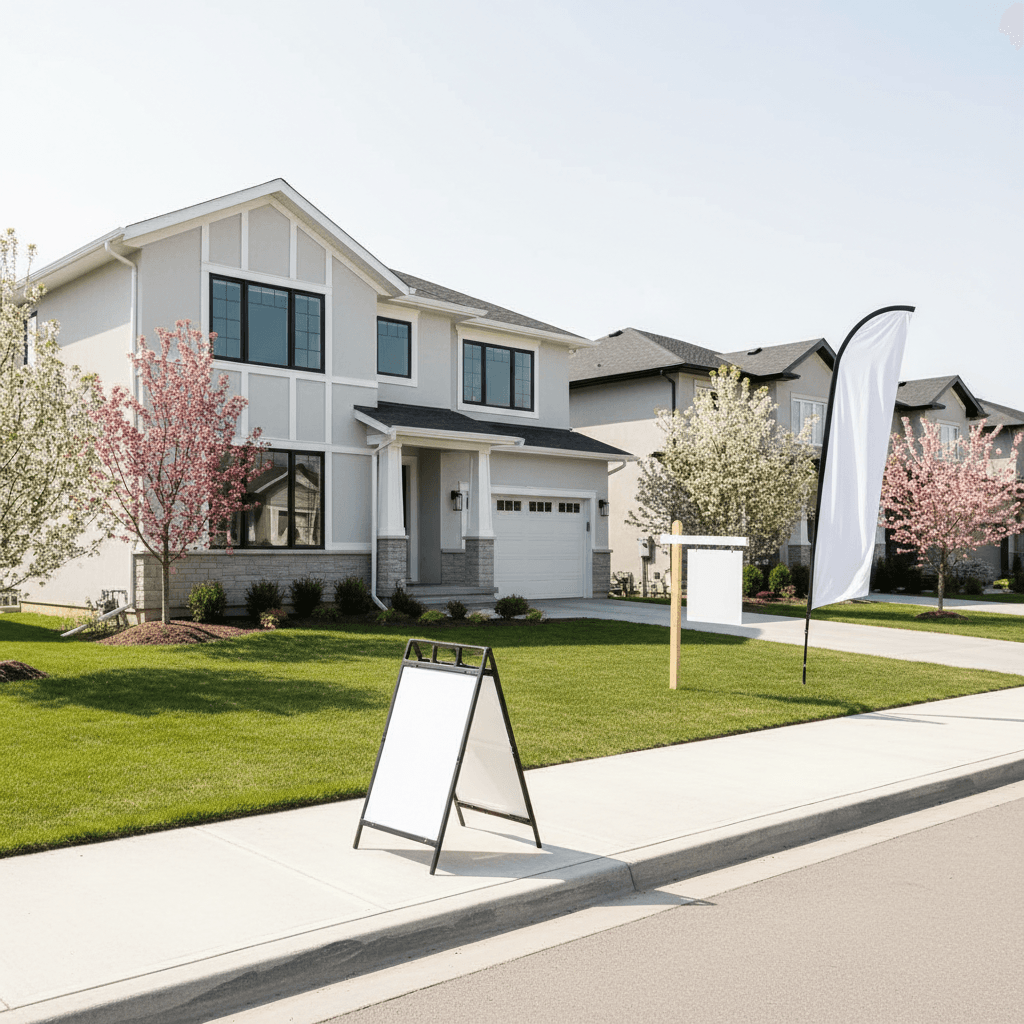
Open house signage is the coordinated set of signs that guide buyers from nearby streets to your listing and confirm they’ve arrived. To choose open house signage that works in Mississauga, start with legible A-frames and yard stakes, add 4–8 directional arrows, and keep letter height at 1 inch per 10 feet of viewing distance near 5004 Timberlea Blvd Unit#18.
By Ashwani — Top Realtor Sign & Print
Last updated: May 12, 2026
Summary
Choose open house signs by matching the route, traffic speed, and sightlines. Use 24×18 yard stakes for approaches, heavy-duty A-frames at the curb, and one large confirmation sign at the door. Keep arrow sequences consistent, letters big, and branding clear. Test visibility from a moving car before showtime.
Here’s what you’ll learn and get from this guide:
- Exactly how to plan a route and sign mix for urban, suburban, and condo listings
- Letter-height and size rules of thumb that keep your message readable
- An apples-to-apples comparison of A-frames, yard stakes, feather flags, and roll-up banners
- Printable checklists plus links to our Open House Signs and related tools
- Local tips around Regional Municipality of Peel conditions and weekend traffic
What is open house signage?
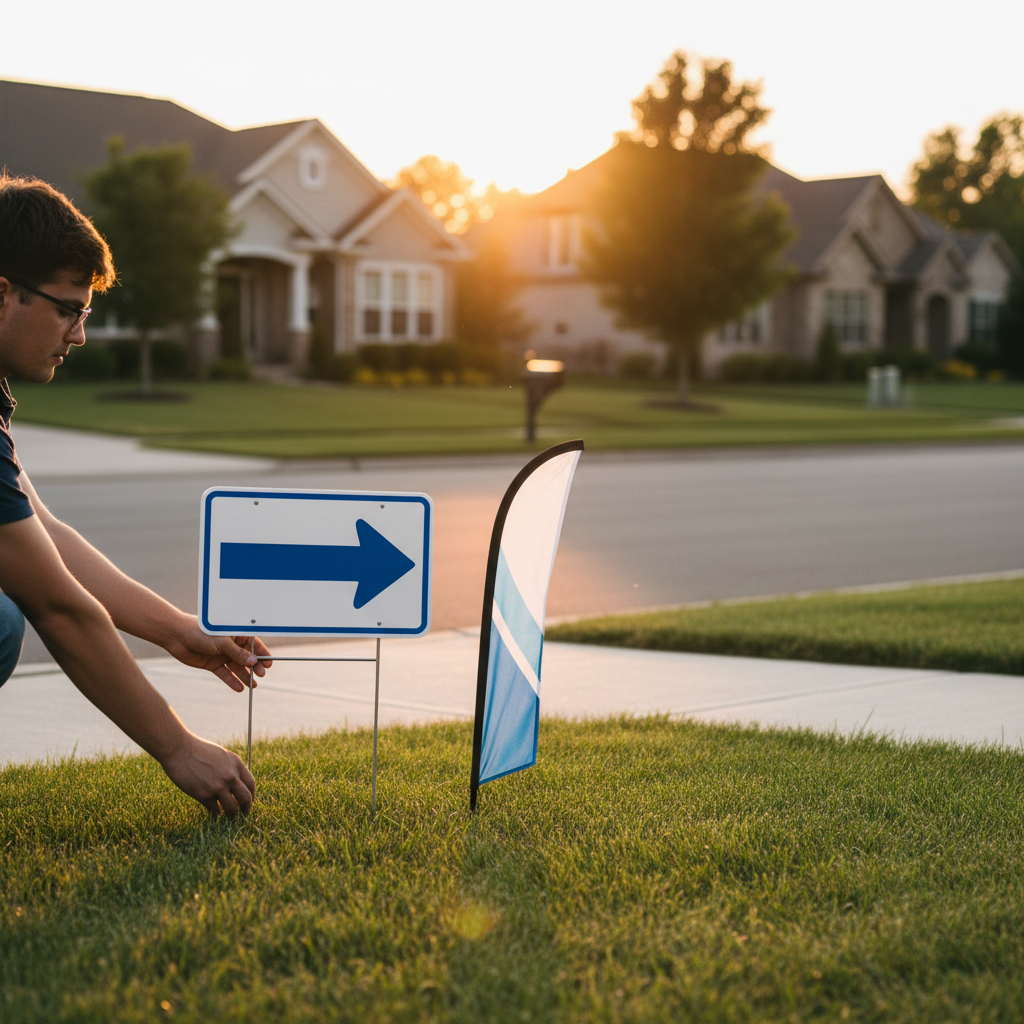
Open house signage is a wayfinding system built from yard stakes, arrows, A-frames, and entrance markers that moves drivers and pedestrians from main roads to your listing. The best setups use 5–9 pieces in sequence, with consistent arrows and branding, so visitors never guess the next turn.
Think of your sign plan as a mini road network. Each piece has a job:
- Feeder signs: 24×18 stake signs that catch attention on the nearest busy road.
- Decision signs: Directional arrows posted before turns and roundabouts.
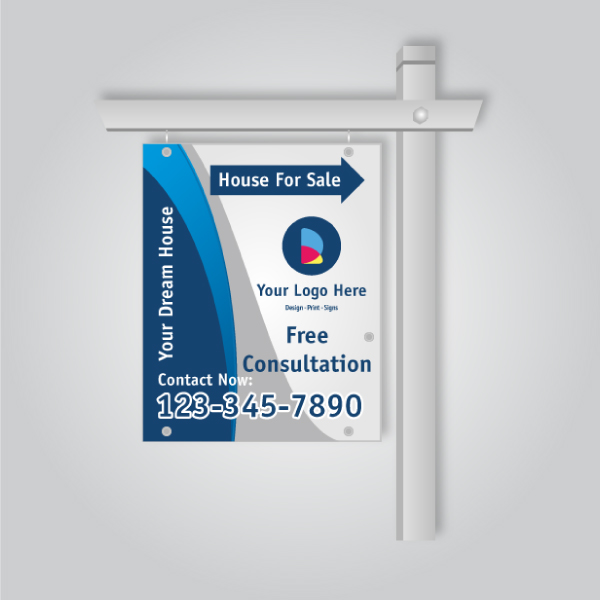
- Confirmation signs: A-frames at the address and a door marker that says “you’re here.”
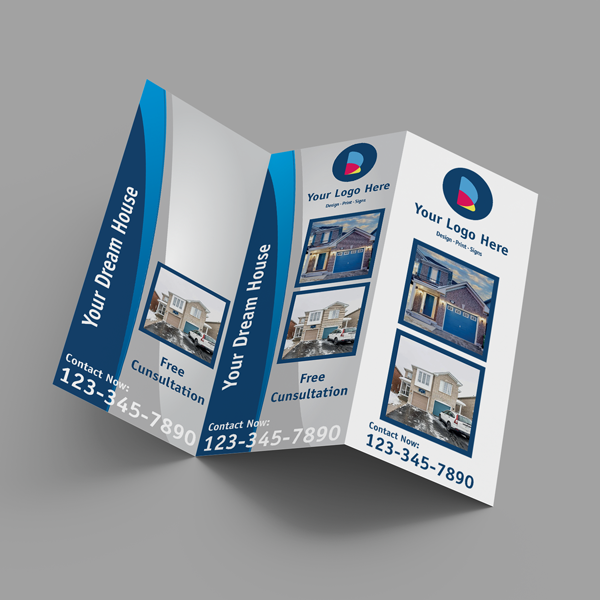
At Top Realtor Sign & Print, we stock durable Open House signs in 10mm PVC and weather-ready coroplast to survive rain and wind while holding color and contrast.
Before you start (prerequisites)
Map the inbound route, confirm municipal rules, and assemble gear. You’ll need 5–9 signs, sandbags or weights, zip ties, gloves, a tape measure, and your printed panels. Pre-approve branding with your brokerage and perform a 10-minute drive test of your approach roads.
- Define objectives: Is the goal foot traffic, brand exposure, or both? Prioritize legibility if routes are long.
- Know local rules: Many cities restrict sidewalk placement or medians. Keep everything on private property with permission when in doubt.
- Route mapping: Choose one primary corridor and one alternate. Aim for a sign every 200–300 feet on the approach.
- Branding checklist: Lock in colors, logo, and brokerage line to stay compliant across yard sign standards.
- Gear pack: Gloves, mallet, zip ties, sandbags/weights, painter’s tape, and a microfiber cloth for quick cleanup.
Local considerations for 5004 Timberlea Blvd Unit#18
- Weekend traffic near Tomken Station East Platform A can spike; plan additional advance warning signs one block earlier.
- Winter dusk arrives early; add reflective elements and favor bold contrast during late-fall open houses in the Regional Municipality of Peel.
- If your route passes Red Brush Park, angle arrows before curves; trees can hide signs until the last moment.
Step-by-step: how to choose open house signage
Pick signs in this order: route length, speed of traffic, and viewing distance. Then choose formats—yard stakes for approach, A-frames at the curb, and a large entry sign. Size letters at 1 inch per 10 feet of viewing distance, and keep arrow sequences consistent across all panels.
- Measure viewing distance
- Estimate typical approach distance (e.g., 50–120 feet on neighborhood roads).
- Use the 1 inch per 10 feet rule for main text. At 80 feet, target ~8-inch headline letters.
- Match sign type to placement
- 24×18 yard stakes for long approaches and corners.
- Steel A-frames for curbside confirmation; they resist wind and sit at driver eye level.
- Feather flags for low-speed streets to add vertical motion and height.
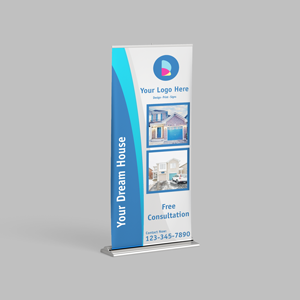
- Roll-up banners for condo lobbies and garage entries.
- Set copy hierarchy
- Line 1: OPEN HOUSE (largest). Line 2: arrow + street/time. Line 3: agent/brokerage.
- Use high-contrast pairs (white-on-red, black-on-white). Thin scripts reduce readability by 20–30% at speed; avoid them.
- Plan the route count
- Short routes: 5–6 total signs. Complex routes: 7–10, including two confirmations at the curb and front door.
- Space arrows 200–300 feet apart on straight roads; closer before turns and hills.
- Weather-proof your setup
- Weight A-frames with 10–20 lbs. of sandbags or water weights.
- Use 10mm PVC or aluminum panels for repeat use; coroplast is light and fast for one-day events.
- Confirm branding and compliance
- Keep brokerage name legible and not eclipsing the event callout.
- Place signs on private lawns with permission; avoid center medians and city fixtures.
- Do a moving car test
- Drive the route at posted speed. Each sign should be readable in ~3 seconds.
- Adjust angles to face oncoming traffic at 30–45 degrees for better pickup.

Recommended letter heights at common viewing distances
| Viewing distance | Headline height | Body/arrow height | Typical use |
|---|---|---|---|
| 30–40 ft | 3–4 in | 2–3 in | Condo lobbies, sidewalks |
| 50–80 ft | 5–8 in | 3–5 in | Neighborhood streets |
| 100–150 ft | 10–15 in | 6–8 in | Arterials, long approaches |
Comparison: A-frames vs. yard stakes vs. feather flags vs. roll-up banners
Use yard stakes for approach and corners, A-frames to confirm arrival, feather flags for motion and height on calm streets, and roll-up banners indoors. Mix two or three formats so buyers spot your listing from multiple angles and distances.
| Sign type | Best for | Ideal size | Setup time | Wind/Weather | Reusability |
|---|---|---|---|---|---|
| Yard stake (24×18) | Approach roads, corners | 24×18 in | Fast (under 1 min) | Good with ground sleeves | High (panel swaps) |
| Steel A-frame | Curbside confirmation | 24×36 in | Medium (2–3 min) | Excellent when weighted | Very high |
| Feather flag | Calm, low-speed streets | 10–15 ft tall | Medium (3–4 min) | Fair; can sway in gusts | High (pole + new flags) |
| Roll-up banner | Indoor lobbies/garages | 33×80 in | Fast (under 1 min) | N/A (indoor) | Very high |
Need gear fast? Our Open House Signs category includes A-frames, durable panels, and directional arrows that align with our sign visibility advice.
Tools and resources for agents
Equip your kit with an online design tool, route map, and reusable hardware. Combine interchangeable panels with steel frames, sandbags, and glove-friendly zip ties so you can deploy signs in 10–15 minutes and break down just as quickly.
- Design faster: Use our browser-based online design tool to update arrows, times, and colors without pro software. Pair with swap-ready PVC panels.
- Hardware set: Steel A-frames, H-stakes, bungee cords, sandbags, reflective tape for dusk.
- Route planning: A printed map with turn-by-turn notes and backup placements.
- Team checklist: Assign one person to placement and one to the moving-car test.
- Professional questions: For broader real estate prep, see these questions to ask pros when organizing an event with partners.
Case studies: quick wins from Mississauga agents
Small changes compound. In two Peel-region scenarios, agents boosted open house traffic by tightening arrow spacing, swapping to heavier A-frames, and adding one indoor roll-up banner. The result: clearer routes, fewer missed turns, and steadier foot flow across the two-hour window.
Case 1: Suburban detached near Timberlea
Challenge: Visitors missed a left turn from a 40 km/h collector road. Solution: The agent added two 24×18 arrows 250 feet apart before the turn, replaced a light A-frame with a weighted steel version, and posted a feather flag for height. Outcome: Continuous arrivals, especially during the first 45 minutes.
Case 2: Condo lobby in the Regional Municipality of Peel
Challenge: Garage entrance was easy to overshoot. Solution: A 33×80 roll-up banner at lobby check-in plus a curbside A-frame reduced confusion. Outcome: Shorter lines at the elevator and better flow to the sign-in table, supported by consistent branding.
Troubleshooting common open house sign problems
Most issues come from angles, size, or wind. Re-aim panels at oncoming traffic, enlarge headlines, and add weights. If arrows confuse drivers, reset to a single, consistent style and re-space them at 200–300 feet on straights and closer before turns.
- Signs keep falling: Weight A-frames and drive H-stakes deeper; rotate panels to cut wind load.
- Drivers miss the turn: Add a pre-warning sign one block earlier; duplicate the arrow just before the corner.
- Low dusk visibility: Increase contrast, add reflective tape to frame edges, and move signs out from shadows.
- Brand clashes: Standardize fonts and colors across all yard signage to prevent mixed messages.
- HOA concerns: Keep everything on permissioned lawns; remove immediately after the event.
Advanced tips to maximize foot traffic
Stack visibility layers: motion (feather flags), mass (A-frames), and repetition (multiple arrows). Use the 3-second rule for readability, a 30–45 degree angle to face drivers, and at least two confirmation pieces at the curb and door.
- Layer formats: Pair an A-frame with a feather flag at the curb to combine mass and vertical motion.
- Confirm twice: Use a curbside A-frame and a door marker; arrivals should see both within 25 feet.
- Route rhythm: Keep arrow intervals consistent so drivers anticipate the next cue.
- Dusk prep: Favor white backgrounds with dark text and reflective accents in late-fall/winter.
- Post-event recap: Capture learning for next time. For general event wrap-up ideas, skim this open house recap theme to structure notes and photos.
- Brand reinforcers: Hand out flyers that echo your sign design so messaging stays consistent indoors.
Frequently asked questions (FAQ)
Agents ask about sign counts, formats, condo rules, and visibility. Most homes perform with 5–9 signs mixing yard stakes and A-frames; condos need indoor confirmation pieces. Keep letters large and arrows consistent, and dry-run the route before doors open.
How many open house signs should I use?
Plan for 5–9 signs for a typical detached home: 3–5 yard stakes guiding in, 1–2 directional arrows near turns, and 1–2 confirmations at the curb and front door. Complex routes with roundabouts or limited sightlines often benefit from two extra arrows.
What size should my open house signs be?
For approach roads, 24×18 inches is the standard yard sign size. At the curb, step up to a 24×36-inch A-frame. Indoors, a 33×80-inch roll-up banner works well for lobbies. Size letters using the 1 inch per 10 feet viewing-distance guideline.
Are feather flags worth using?
Yes—on low-speed streets and calm days. Flags add vertical motion that stands above parked cars and shrubs. Pair one with a curbside A-frame for a stronger arrival cue. Avoid small flags on windy corners, where a weighted A-frame performs better.
What should I do for condo open houses?
Use clear curbside confirmation (A-frame) and strong indoor wayfinding. Place a roll-up banner at lobby check-in and a second sign near elevators. Keep all placements within building rules and remove everything immediately after your time window.
Key takeaways
Focus on legibility, placement rhythm, and multi-format visibility. Use stake signs to guide, A-frames to confirm, and indoor banners to orient. Weight hardware, size letters by distance, and test from a moving car. That’s how you choose open house signage that consistently brings in buyers.
- Legibility beats decoration—large letters and contrast win.
- Use 5–9 coordinated pieces; repeat arrows near turns.
- Weight A-frames and rotate panels into the traffic flow.
- Mirror your sign design on indoor materials for continuity.
Conclusion and next steps
A reliable open house sign plan blends route mapping, big readable type, and sturdy hardware. Start with yard stakes for approach, A-frames for confirmation, and one indoor banner. Drive-test, refine spacing, and keep branding consistent from curb to clipboard.
Ready to deploy? Explore our curated Open House Signs, or simplify with bundled Realtor packages. Prefer a quick consult? Drop by our Mississauga shop at 5004 Timberlea Blvd Unit#18 to plan your route.
Soft CTA: Need same-day pickup? Call ahead and we’ll prioritize panels and A-frames for your time window—then mirror the design on door hangers and flyers for a cohesive experience.
Additional resources and templates
Use these resources to tighten execution: internal design tools, quick checklists, and broader real estate prep guides. Keep your process simple, repeatable, and fast to set up under time pressure.
- Product hub: Open House Signs and swap-ready panels
- Deep dive: Beginner’s guide to yard sign printing
- Branding tip sheet: What makes a good For Sale sign
- Bundled support: Realtor packages overview
- Seller prep context: A homeowner-focused FSBO checklist can help align expectations ahead of open house day.