Banner printing price factors for agents are material, size, finishing, hardware, design complexity, quantity, and turnaround. At Top Realtor Sign & Print in Mississauga (5004 Timberlea Blvd Unit#18), these variables guide fast, brand-safe banners for listings and events. Optimize each factor to maximize visibility while staying within your marketing plan.
By Ashwani — Top Realtor Sign & Print • Last updated: 2026-06-04
Overview and Table of Contents
Agents control banner value by choosing the right material, size, finishing, hardware, quantity, design, and turnaround. This guide explains each factor in plain language and shows how to plan, proof, and pick up locally for stress-free launches.
Use this complete, agent-focused playbook to plan banners for listings, broker tours, and events—without guesswork.
- What is banner pricing for agents?
- Why banner pricing factors matter
- How banner pricing works (step-by-step)
- Types of banners and materials
- Finishing and hardware options
- Design complexity and file prep
- Size, quantity, and turnaround
- Local pickup and logistics in Mississauga
- Best practices to maximize value
- Tools and resources for agents
- Mini case studies and examples
- Frequently Asked Questions
- Conclusion, key takeaways, and next steps
What is banner pricing for agents?
Banner pricing for agents refers to how material, size, finishing, hardware, design time, quantity, and turnaround combine to determine a banner’s total value. Control these inputs, and you control outcomes—speed, durability, readability, and brand impact—without wasting effort or budget.
In practice, banner printing price factors for agents fall into seven buckets: material, size, finishing, hardware, design complexity, quantity, and turnaround. Each bucket influences the others. When you balance them, your banners look sharp, arrive on time, and work hard at every showing or event.
At Top Realtor Sign & Print, we help agents navigate tradeoffs across vinyl (indoor/outdoor), mesh (wind-exposed), blockout (double-sided), and fabric (photo-friendly). We also guide finishing choices—grommets, hems, pole pockets, and stand types—so your setup matches real-world use, from open houses to builder previews.
Why banner pricing factors matter
Picking the right banner inputs protects brand standards, ensures legibility at distance, and reduces last-minute stress. Agents who plan materials, finishes, and timing upfront achieve reliable launches and reuse banners across more events.
Agents juggle fast-moving schedules, compliance with brokerage branding, and changing venues. Smart planning prevents common issues like glare in photos, fabric wrinkling, or hardware that doesn’t fit the space. It also minimizes reprints by aligning materials with weather, installation points, and travel.
We’ve found that banner projects succeed when a design brief locks three items early: target viewing distance, mounting method, and event timing. Those choices steer legible font sizes, finishing (grommets vs. pole pockets), and production windows that fit your calendar.
For ongoing campaigns, we recommend a core kit: one durable outdoor banner, one photo-friendly indoor banner, and one portable roll-up. This trio covers most Realtor use cases without constant redesigns—and pairs well with riders and directional signs.
How banner pricing works (step-by-step)
Banner pricing flows from a simple process: define use case, choose material and size, select finishing and hardware, prepare design files, confirm timing, and schedule pickup. Each step narrows variables so production is predictable and fast.
Six-step planning workflow
- Define the use case. Indoor photo backdrop, windy fence, lawn frame, lobby easel, or trade show booth.
- Choose the material. Vinyl, mesh, blockout, or fabric—matched to environment and photo needs.
- Set the size. Anchor on viewing distance and installation points; keep aspect ratio consistent across campaigns.
- Select finishing and hardware. Grommets/hem, pole pockets, or a roll-up cassette for quick setups.
- Prepare the design. High-contrast layouts, large type, and export-ready files (CMYK, 150–300 PPI at scale).
- Confirm turnaround and pickup. Align your date with production windows and local pickup availability.
Simple process table
| Step | Your Decision | What It Impacts |
|---|---|---|
| Use Case | Indoor, outdoor, windy, photo backdrop, portable | Material pick, finishing, hardware |
| Material | Vinyl, mesh, blockout, fabric | Durability, print look, weight |
| Size | Width × height based on venue | Readability and setup |
| Finishing | Grommets/hem, pole pockets | Mounting method and sturdiness |
| Hardware | Roll-up stand, frame, zip ties, bungees | Portability and reuse |
| Design & Files | High contrast, large type, CMYK, 150–300 PPI | Print sharpness and brand compliance |
| Turnaround | Standard or rush | Pickup plan and event readiness |
Need help lining up steps with your calendar? Our Mississauga turnaround guide explains lead-time basics and how to stage multi-item orders.
Types of banners and materials
Choose vinyl for versatile durability, mesh for wind, blockout for double-sided installs, and fabric for photo-friendly indoor displays. Align the material with weather exposure, mounting points, and whether you need glare-free photography.
Agents typically toggle between four core substrates. The right match reduces reprints and protects your brand in photos and video.
Common agent use cases
- Vinyl (indoor/outdoor): Yard fences, building facades, railings, lobby areas; easy cleaning and strong color.
- Mesh (wind-exposed): Construction hoarding, perimeter fencing, sports fields; airflow reduces strain on ties.
- Blockout (double-sided): Street poles, frames where light bleed is an issue; prints on both sides stay rich.
- Fabric (photo backdrops): Media walls, luxury lobbies, and interiors; softer look with reduced glare.
Material comparison table
| Material | Best For | Durability | Print Look | Notes |
|---|---|---|---|---|
| Vinyl | General outdoor/indoor | High | Bold color, slight sheen | Great default; cleans easily |
| Mesh | Wind-exposed installs | High in wind | Slightly lower saturation | Airflow reduces billowing |
| Blockout | Double-sided frames | High | Rich on both sides | No light show-through |
| Fabric | Photo-friendly interiors | Medium | Soft, glare-free | Ideal for media walls |
Explore our current banners collection and business banner options to compare real-world setups used by local agents.
Finishing and hardware options
Finishing and hardware determine how a banner mounts, resists weather, and packs for travel. Grommets and hems suit fences, pole pockets fit frames, and roll-up cassettes create fast, portable displays.
Think of finishing as the interface between your banner and the real world. The wrong interface leads to last-minute improvisation with tape and string; the right one gives you a 2-minute setup and a professional presence in any space.
Finishing choices
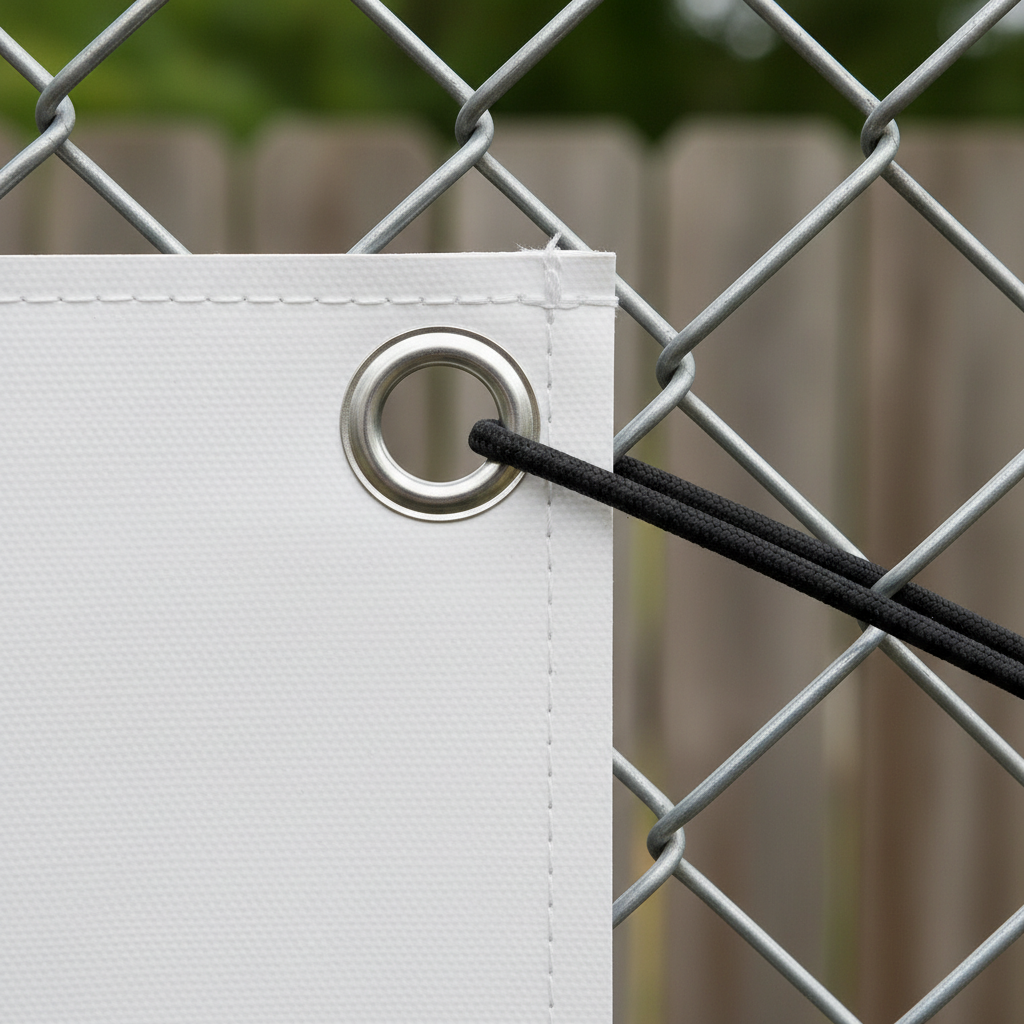
- Hems + grommets: Reinforced edges and metal eyelets for zip ties, hooks, or bungees.
- Pole pockets: Sewn sleeves to slide onto rods or frames; clean look without visible hardware.
- Reinforced corners: Extra strength where strain concentrates during windy conditions.
- Wind slits (vinyl): Crescent cuts to relieve pressure; use selectively where needed.
Hardware selection
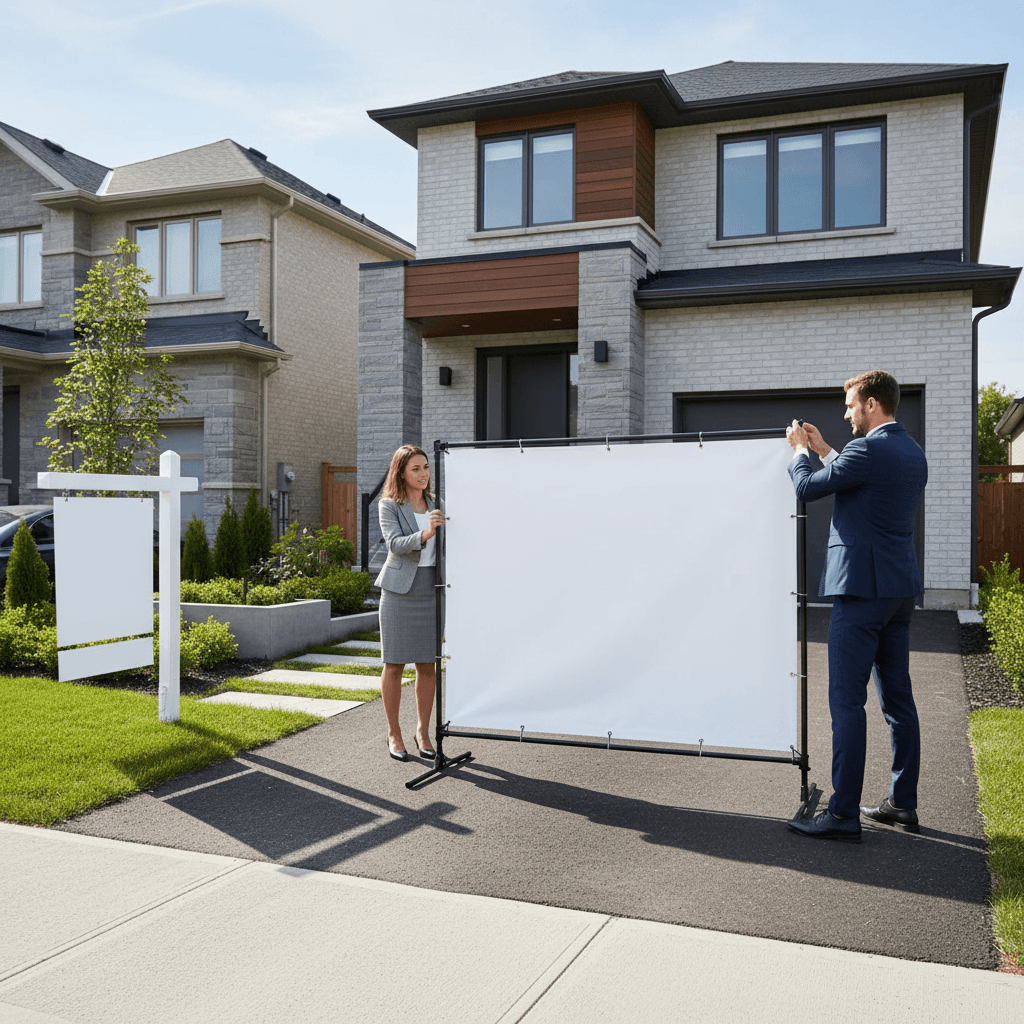
- Roll-up stands: Compact cassette + pole; perfect for hallways, lobbies, and model suites.
- Frames and rods: For pole-pocket installs; ideal for stage backdrops and step-and-repeat looks.
- Outdoor ties: Zip ties, bungees, or rope matched to fence gauge or railing diameter.
- Ground stakes: For lawn/soil setups when a frame or A-frame is used adjacent to banners.
See event-ready banner design tips and compatible hardware-ready formats we print for GTA agents.
Design complexity and file prep
High-contrast layouts, large type, and clean branding improve legibility and speed production. Supply CMYK print-ready PDFs at 150–300 PPI at final size, and keep critical text at least 1.5 inches from edges.
Readability is the currency of banner performance. At distance, fewer elements win. Lock your hierarchy: headline, subhead, call-to-action, and logo. Use color contrast that passes accessibility checks and broker brand rules.
File prep checklist
- Use vector logos (AI, EPS, or high-res PDF) and outline fonts before export.
- Convert images to CMYK and set resolution to 150–300 PPI at print scale.
- Include 0.5–1 inch safe margins; add bleed if required by finishing.
- Specify grommet spacing or pocket size in the notes for accurate placement.
- Name files clearly: brokerage_project_banner-size_material_date.pdf
No design software? Our browser-based editor eliminates hurdles so you can customize banners fast. Pair your artwork with directionals, riders, and core marketing materials for a consistent kit.
Size, quantity, and turnaround
Size controls viewing distance and layout flexibility; quantity supports reuse across listings; turnaround locks your event date. Batch orders around a standard size to share hardware and speed future launches.
Start from the venue. Measure the width between anchor points and ceiling height. Then back into type size and layout. If you run weekly open houses, standardize one winning format (for example, 2 ft × 5 ft or 3 ft × 6 ft) and a matching roll-up—swap messaging as needed.
Planning multiple events? Group banners with shared colors and frames so mounting gear travels between properties. Standardization reduces complexity, protects brand consistency, and simplifies storage.
For urgent timelines, align with our turnaround recommendations and check availability for same-day or next-day pickup on companion items like flyers and cards.
Local pickup and logistics in Mississauga
Pickup at 5004 Timberlea Blvd Unit#18 in Mississauga streamlines launches for agents across the Regional Municipality of Peel. Plan your route, confirm readiness, and stage banners with other sign orders for faster, fewer trips.
Coordinating banners with “For Sale,” “Open House,” and directional signs saves time on listing day. Stage materials for one pickup window, then run a predictable route between showings. If you’re pairing banners with riders or inserts, bundle proofs in a single review cycle.
Local considerations for 5004 Timberlea Blvd Unit#18
- Peak pickup windows often align with weekend open houses; confirm readiness early if you’re staging near Tomken Station East Platform A transit times.
- Winter and shoulder seasons mean wind; prefer mesh on exposed fences and reinforced corners for long installs.
- For photos near Red Brush Park or similar greenery, test fabric or matte vinyl to reduce glare in bright daylight.
Best practices to maximize value
Standardize sizes, build a core hardware kit, keep layouts simple, and plan proofs early. These habits cut reprints, speed setup, and maintain brand consistency across listings and events.
Do-this-first moves
- Commit to a core set: One outdoor vinyl, one indoor fabric, and one roll-up banner.
- Standardize widths: Reuse frames and stands; store a shared mounting kit in your trunk.
- Lock brand rules: Colors, type scales, and logo placement that match brokerage standards.
- Proof early: Approve copy and placement before finishing; avoid last-minute layout changes.
Avoid these pitfalls
- Overcrowded layouts that fail at 15–30 feet viewing distance.
- Ignoring wind at exposed venues; use mesh or add reinforced edges.
- Non-standard sizes that don’t fit existing hardware or storage.
- Too-glossy materials in camera-heavy interiors; switch to fabric or matte.
When you need a bundled approach beyond banners, review our agent-focused packages and best package picks to stage complete campaigns.
Tools and resources for agents
Use a browser-based design editor, a size-and-distance cheat sheet, and a reusable hardware checklist. Together, these tools help you approve designs faster and keep installations predictable.
- Online design editor: Customize banners without pro software; export print-ready files in minutes.
- Viewing-distance guide: Headlines should remain legible at planned approach distances; test on a screen at 100% zoom.
- Hardware bag: Zip ties, bungees, tape, microfiber cloth, and a small utility knife for trimming loose ends.
- Campaign calendar: Align proofs, production, and pickup with listing photos, MLS go-live, and open houses.
- Cross-sell planning: Pair banners with riders and directionals; see our banners and design tags for inspiration.
You’ll also see stronger performance when banners complement tactics covered in this branding guide. And if you’re mapping larger kits, don’t forget companion items like brochures and flyers available for quick pickup.
Mini case studies and examples
Real-world examples show how aligning material, size, finishing, and timing prevents reprints. These three scenarios reflect common agent needs across listings, community events, and builder launches.
1) Weekly open houses in changing weather
A Mississauga agent rotates properties every weekend. We standardized a 3 × 6 ft vinyl with hems/grommets for fences plus a matching roll-up for interiors. The agent reuses the same hardware bag and adds riders and directionals for each property—streamlined setup with predictable visibility.
2) Community sponsorship on a sports field
For a spring sponsorship, mesh banners with reinforced corners avoided billowing on chain-link fencing. A bold, high-contrast layout stayed readable from bleachers. The banner returned for two more events—proof that durable finishing pays off in reuse.
3) Builder launch with photo ops
A new-build preview needed a soft, glare-free backdrop. We used fabric with pole pockets and a clean, repeatable type system. Paired with a roll-up at the entrance and brochures on a table, photos turned out crisp and on-brand.
If you’re planning broader campaigns, these industry explainers offer general context on listings and market activity: a high-level listings guide, a Toronto market overview, and tips for speeding up sales. Use them for messaging ideas, then localize to your neighborhood.
Free banner planning consult (10 minutes)
Bring your venue photo, target distance, and preferred size. We’ll recommend material, finishing, and a pickup plan—then align banners with your riders, directionals, and cards for cohesive branding.
Visit: Top Realtor Sign & Print, 5004 Timberlea Blvd Unit#18, Mississauga • Start a project
Frequently Asked Questions
These concise answers cover design, durability, reuse, and timing so agents can move from idea to pickup without delays.
What banner material works best for outdoor open houses?
Vinyl is the most versatile choice outdoors thanks to its durability and easy cleaning. If the site is windy or on a chain-link fence, switch to mesh or add reinforced corners to reduce strain on ties without compromising readability.
How do I make sure my banner is readable from the street?
Start with viewing distance. Use large, high-contrast type and limit elements to a headline, subhead, call-to-action, and logo. Print-ready files at 150–300 PPI in CMYK keep edges crisp so letters don’t blur when scaled to final size.
Can I reuse the same hardware for different banners?
Yes. Standardizing widths lets you reuse roll-up stands, frames, and mounting kits across listings. Plan one or two common sizes and keep a trunk-ready bag of zip ties, bungees, and cloths for fast setup at any venue.
What’s the fastest way to go from design to pickup?
Use our online editor or provide a CMYK, print-ready PDF with margins and finishing notes. Approve proofs early, align with our turnaround recommendations, and, when possible, group banners with riders and directionals into one pickup.
Conclusion, key takeaways, and next steps
Great banners result from aligned decisions on material, size, finishing, hardware, design, quantity, and timing. Standardize where you can, keep layouts simple, and plan proofs and pickup together for on-time launches.
Key takeaways
- Match material to weather, mounting points, and photography needs.
- Standardize one or two sizes to reuse hardware and simplify storage.
- Keep layouts short, high-contrast, and readable at distance.
- Bundle proofs and pickups with your other listing signs.
- Leverage local pickup at 5004 Timberlea Blvd Unit#18 to hit firm dates.
Next steps for agents
- Decide your core sizes and materials for the upcoming quarter.
- Gather logos, brand colors, and a short message hierarchy.
- Review our banners collection and design notes.
- Skim our turnaround guide to align dates.
- Book a quick consult or stop by for pickup coordination in Mississauga.