How to plan a realtor marketing kit refers to creating a coordinated set of print signs and materials—business cards, flyers, yard signs, riders, banners, and brochures—that agents use to promote listings and brand themselves. A well-planned kit keeps you ready for listings, open houses, and pop-up events near 5004 Timberlea Blvd Unit#18 in Mississauga—without last-minute scrambles.
By Ashwani — Top Realtor Sign & Print
Last updated: 2026-06-03
Introduction
A realtor marketing kit is a ready-to-go bundle of core print and sign assets—For Sale signs, Open House signage, directional signs, riders, banners, flyers, brochures, and business cards—built to work together. The best kits standardize branding, speed setup, and reduce stress so you can launch a listing or event in hours, not days.
Agents who systemize their kit waste less time, protect brand consistency, and capture more in-person leads. You’ll learn a practical framework that aligns with on-the-ground realities in Mississauga and the Regional Municipality of Peel, plus tools available from our local shop.
At a Glance
Plan your realtor kit by defining goals, standardizing branding, selecting essential signs and print, and organizing fast pickup options. Build a repeatable checklist that covers listings, open houses, and community events so you can move from signed agreement to live marketing without delays.
- Core assets: Business cards, flyers, brochures, postcards, door hangers, yard signs, riders, directional arrows, roll-up banners.
- Brand standards: Fonts, colors, logo placement, photography style, brokerage compliance.
- Rapid logistics: Same-day pickup for rush items; standard turnaround for bulk orders.
- Storage & checklists: Label bins, replenish quarterly, track what’s in the car vs office.
- Digital-ready: Keep print files and QR codes synced to current listings.
Before You Start (Prerequisites)
Confirm brand standards, compile your property marketing goals, and map logistics to your pickup point at 5004 Timberlea Blvd Unit#18 in the Regional Municipality of Peel. With clear specs and a staging plan, you’ll place orders faster, avoid reprints, and roll out consistent assets at every touchpoint.
- Define purpose: What must your kit cover in the next 90 days? New listings, open houses, a neighborhood farming push, or a spring event series.
- Gather brand files: Vector logo (AI/SVG/PDF), brand colors (CMYK/RGB/Hex), approved headshot, team/brokerage lockups, and typography.
- Compliance checklist: Brokerage logo rules, disclaimer text, license information, and any mandatory marks that affect sign and print layouts.
- Photography: 10–15 evergreen photos (portrait for cards, landscape for signs) with consistent lighting and background.
- Contact hierarchy: Primary phone, mobile, website/QR, and your preferred call-to-action—kept consistent across the kit.
- File management: Name files with versioning (e.g., C21_Headshot_v3.jpg) and save print-ready PDFs to a shared drive so your team can reorder within minutes.
Local considerations for 5004 Timberlea Blvd Unit#18
- Plan Saturday morning pickups to avoid weekday traffic near Tomken Station East Platform A, and batch orders to support multiple weekend opens.
- Seasonality matters: windy spring days can tip lightweight A-frames; add sandbags and choose thicker substrates for outdoor signs.
- When canvassing around open houses, favor family-friendly paths near Red Brush Park and be mindful of local sign bylaws for temporary placements.
How to Plan a Realtor Marketing Kit: Step-by-Step
Build your kit in nine steps: clarify goals, lock branding, choose core signs, select print pieces, add event assets, prepare riders/inserts, create a restock system, plan pickup timelines, and stage an “always ready” go bag. This sequence minimizes rush stress and protects brand consistency.
Step 1 — Clarify the next 90 days
- List event types: New listings, open houses, pop-up community tables, and brokerage events.
- Volume targets: How many opens per month? How many listing launches? Plan quantities accordingly.
- Example: If you expect two new listings and four opens next month, pre-pack at least two yard kits and eight directional arrows.
Step 2 — Lock your brand system
- Business cards: Consider soft touch, raised spot UV, gold/silver foil, or painted edges for memorability.
- Template library: Create master templates for flyers, brochures, and postcards with swappable photos and addresses.
- Internal help: If you need layout support, our in-house design team can align assets with your brokerage rules.

Step 3 — Choose core yard and event signs
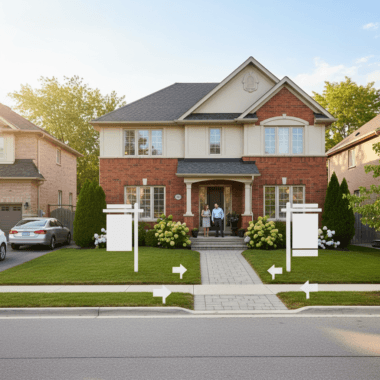
- For Sale and Open House signs: Durable panels with high-contrast layouts for drive-by readability.
- Directional arrows: Stackable, easy-to-place signs that guide traffic to the door.
- Roll-up banner: Reusable indoor asset for builder showrooms, condo lobbies, or partner events.
- Pro move: Keep one spare panel and hardware kit in your trunk at all times.
Step 4 — Select your print leave-behinds
- Flyers: Quick highlights, floor plan thumbnail, QR to the listing page.
- Brochures (tri-fold or Z-fold): Photography-forward; feature neighborhood amenities and schools.
- Postcards: 14pt stock for mailers and just-listed/just-sold campaigns.
- Door hangers: Hyperlocal lead generation for 1–2 blocks around each open house.
Step 5 — Prepare riders and inserts
- Custom riders: Flexible message bars (e.g., Coming Soon, Open Sat, Pool, 3-Car Garage).
- Insert signs: Quick-swap panels for recurring messages to avoid full reprints.
- Context callout: Many readers ask “what is a rider sign used for?”—it’s the modular message that updates your main sign without replacing it.
Step 6 — Build your in-person kit
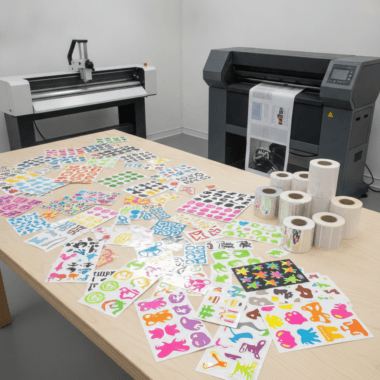
- Table tent cards and stickers: Easy branding at community events or lender partner tables.
- Presentation folders: Polished packets for offers or listing presentations.
- Notepads and calendars: Useful giveaways that keep your contact details visible year-round.
Step 7 — Create a restock system
- Inventory bins: Label by asset type and count (e.g., Flyers – 200, Postcards – 500).
- Reorder triggers: When any item dips below your minimum, place a same-day or standard order.
- Shared checklist: Keep a laminated car-boot checklist for event-day packing.
Step 8 — Plan pickup and turnaround
- Same-day options: Use same-day pickup for last-minute flyers or business cards when schedules shift.
- Standard runs: Batch larger orders to optimize consistency and reduce reorders.
- Internal resource: See our sign printing turnaround guide for typical windows.
Step 9 — Stage an “always ready” go bag
- Event essentials: Zip ties, sandbags, gloves, extra stakes, scissors, painter’s tape, and a small toolkit.
- Print bundle: 50–100 flyers, 25 brochures, 50 postcards, business cards, and a few door hangers.
- Sign hardware: 8–10 directional arrows, 1 roll-up banner, and spare rider clips.

Tools and Resources You’ll Actually Use
Use a browser-based design editor, standardized templates, and a local pickup workflow. Keep a shared folder with print-ready PDFs and a replenishment checklist so anyone on your team can place a same-day or standard order without waiting on design files.
- Ready-to-print flyer templates: Start with streamlined frameworks and swap in new photos. Explore our flyer options when you need quick-turn prints.
- Business cards on demand: For new team members or rebranding, our same-day business cards keep you in circulation.
- Realtor bundles: Consolidate essentials with curated realtor packages so you’re never missing a critical item.
- Signage strategy: For event-heavy weeks, review the turnaround guide and book panel runs ahead.
- Planning checklist: Use our realtor materials checklist to audit what’s in your kit.
Same-Day Pickup vs. Standard Printing
Use same-day pickup for time-sensitive events or sudden listing changes, and standard printing for bulk orders and specialty finishes. This split protects quality while keeping you nimble when schedules shift.
| Scenario | Best Option | Why It Works |
|---|---|---|
| Open house added 48 hours out | Same-day flyers + cards | Stay agile without sacrificing consistency; swap QR codes fast. |
| Two listings launching next week | Standard yard panels | Batch orders for uniform color and finish across properties. |
| Luxury listing appointment tomorrow | Same-day premium cards | First impressions matter; raised spot UV or foil elevates your leave-behind. |
| Quarterly neighborhood farm | Standard postcards | Bulk mailers benefit from planned runs and consistent paper stocks. |
Troubleshooting: Common Kit Gaps and Quick Fixes
Most kit issues trace back to missing brand files, unclear quantities, or last-minute changes. Keep a digital template library, set minimum stock levels, and stage spares to avoid day-of surprises.
- My colors don’t match across pieces. Use CMYK values, request a print proof on your preferred stock, and stick to one paper family per campaign.
- I forgot riders for a feature (e.g., Pool). Keep two blank riders and vinyl decals to letter urgent messages.
- Traffic missed my turn. Add two more directional arrows at prior intersections and confirm arrows face oncoming traffic.
- My event table looks empty. Pack a compact roll-up banner and table tent cards to brand any surface in minutes.
- No time to redesign flyers. Use your saved template, swap photos, update QR, and submit as a same-day job.
Advanced Tips (Optional) for Standing Out
Differentiate with premium card finishes, consistent QR flows, and a modular sign system. Pair a high-touch leave-behind with a simple digital path so leads can act on the spot.
- Premium cards that get kept: Soft touch with raised spot UV or painted edges increases “keep” rates at events.
- Modular sign strategy: Combine durable main panels with custom riders so you update messages without reprinting full signs.
- Neighborhood storytelling: Use brochures to highlight trails, parks, and transit, then drive deeper info via QR to your listing page.
- Branding on a budget: If you’re optimizing spend, see tips in our branding guide.
- Turn process into product: Package your kit as a standard for every listing. Document it so team members can run it without you.
Helpful mid-article prompt: Not sure where to start? Explore curated realtor packages—they mirror the steps above so you can be market-ready faster.
Frequently Asked Questions
These quick answers address the most common planning questions agents ask about building a realtor marketing kit that’s fast, consistent, and on-brand.
What should be in a basic realtor marketing kit?
Include business cards, flyers, a tri-fold brochure, postcards, door hangers, For Sale and Open House signs, directional arrows, at least two custom riders, and a compact roll-up banner. Add a go bag with stakes, zip ties, sandbags, tape, and a small toolkit for day-of setup.
How do I plan quantities without wasting print?
Project the next 90 days of activity and set minimums: for example, enough flyers for two opens per listing and a reserve for last-minute showings. Keep bins labeled with counts and reorder when any item hits your minimum threshold.
When do I choose same-day pickup vs standard printing?
Use same-day pickup when timelines shift—like an added open house or a new team member needing cards fast. Use standard printing for bulk or specialty finishes so everything matches perfectly across listings.
What is a rider sign used for?
A rider is a small, swappable panel that attaches to your main yard sign to update messages—like Coming Soon, Open House, or Feature highlights—without reprinting the primary sign. It makes your sign system flexible and cost-effective.
Additional Resources
Use the following resources to finalize your kit and stay organized: checklists, turnaround references, and curated bundles you can adapt to each listing and event.
- Plan with our realtor checklist to avoid day-of gaps.
- Review Mississauga sign turnaround tips before busy weekends.
- Bundle fast with agent-ready packages that map to this step-by-step plan.
- Explore a general listings overview from an industry guide at HouseUp for context on campaign timing.
- Skim a marketing strategy summary at Anand Realty to compare messaging ideas for print.
- See a local perspective on buyer expectations via Malika Homes when crafting neighborhood highlights.
Conclusion
A standout realtor marketing kit pairs standardized brand assets with nimble logistics. Lock your templates, stage core signs and print, and set stock minimums so you can activate any listing or event on short notice—confidently and consistently.
- Key takeaways:
- Document brand specs and file naming conventions.
- Pre-pack yard signs, riders, and a banner you can deploy anywhere.
- Keep flyer and brochure templates ready for same-day runs.
- Use a replenishment checklist and labeled bins to stay ready.
Next step: If you want a head start, browse our curated realtor packages or talk with us at our Mississauga pickup location—you’ll leave with a kit that’s ready to work.