This step-by-step checklist helps Realtors and brokerage marketers decide what printed signs and collateral to order for a new listing or open house. It is organised by urgency and impact so you can act the same day a listing goes live, keep materials brokerage-compliant, and use local services for fast pickup and delivery in Mississauga and across Ontario. For related first-party details, review real estate marketing materials.
Quick decision checklist: what to order first when time is short
When a listing goes live, act fast and work in three tiers so nothing essential is missed.
Same-day essentials
- Order business cards for immediate networking and sign-in handouts, because they are the easiest item to distribute and many shops offer same-day pickup for them. Confirm cut-off times with your local provider such as Top Realtor Sign & Print.
- Print single-sheet property flyers sized 8.5 by 11 inches or A4 to hand out at showings and to leave behind for neighbours and visitors.
- Place one For Sale yard sign at the property to make the listing visible from the street for drive-by traffic.
Next 24-hour high-impact items
- Reserve an open house A-frame or a roll-up banner to attract passersby on the day of the event and to signal parking and entry points.
- Order directional stake signs to guide traffic from main roads to the property and to reduce the chance visitors miss the turn.
- Print extra batches of flyers and business cards after you confirm expected foot traffic to avoid running short mid-event.
Can-wait items
- Produce multi-page brochures or high-end listing booklets when you have time to proof layouts and photography carefully.
- Plan postcards for a neighbourhood mail drop and branded giveaways for planned follow-up campaigns.
- Schedule custom riders, large-format promotional installs, or specialty insert signs when you have brokerage approvals and extra production time.
Use this triage to avoid last-minute scrambling. Local printers like Top Realtor Sign & Print make same-day turnaround possible for select items and provide design help if you need quick artwork adjustments. Industry resources also note that printed materials remain highly effective when paired with digital campaigns, so balance speed with quality when you can (Xara).
Step 1: define the objective and audience for this listing
Before you order, answer a short checklist about the listing because material choices follow immediately from the goal.
- Decide the primary goal: attract an open-house crowd, capture leads for follow-up, or strengthen agent and brokerage branding.
- Identify the target buyer such as downsizers, young professionals, or investors, because high-end finishes and multi-page brochures work better for luxury buyers while simple flyers and postcards can attract first-time buyers.
- Assess the neighbourhood context: high-traffic arterial streets demand larger, more visible signage while a quiet cul-de-sac may benefit more from targeted door hangers and local postcards.
Choose materials that match measurable objectives such as lead capture numbers and brand visibility rather than ordering every available product.
Step 2: pick high-impact signs and where to place them
Signs are the first clue most local buyers have. Select signs for visibility, durability, and compliance with brokerage and municipal rules.
For Sale signs
- Choose rigid coroplast or aluminium for longer life and weather resistance, because these materials hold up to wind and wet conditions better than thin board stock.
- Use riders or insert panels to display price status, open-house times, or a second agent contact without replacing the entire board.
Open house signs and roll-up banners
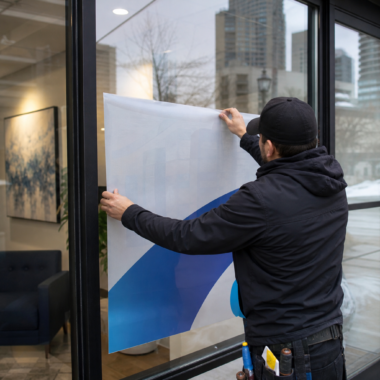
- Use roll-up banners for portability and strong visual impact at driveways and community centres, and choose vinyl for outdoor durability or fabric to reduce glare in photos.
- Place open house signage close enough to the road to be noticed by drivers while avoiding obstruction of sightlines and compliance issues.
Directional signs
- Position directional signs at major intersections or turns leading to the property and space them to give drivers clear visual cues a few hundred metres before the turn when possible.
- Use a clear arrow, short copy, and consistent colours so drivers can read each sign at a glance.
Always check your brokerage brand guidelines and local bylaws before installing signs on public property to avoid fines and removal orders.
Step 3: choose printed collateral for open houses and follow-up

Printed collateral serves three functions: immediate handouts, professional leave-behinds, and targeted follow-up.
What to bring to the open house
- Bring a one-page property flyer with a standout photo, concise facts, and clear contact details. Bring at least 50 copies for a typical open house and increase that number for higher-traffic neighbourhoods.
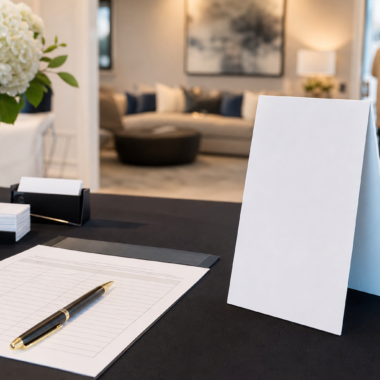
- Use sign-in sheets or a tablet sign-in to capture visitor information, and place a small stack of business cards on the sign-in table to make follow-up easy.
- Carry door hangers or local postcards to distribute to neighbouring houses after the event for targeted follow-up messaging.
When to upgrade to brochures or booklets
- Order a multi-page brochure when the property needs multiple photos, detailed floor plans, or feature lists. Allow time for layout and proofing to avoid typos and cropping issues.
- Use premium finishes such as soft touch lamination, raised spot UV, foil stamping, or painted edges on business cards and brochures when you want to convey a luxury presentation, but plan for longer production times.
Printed pieces continue to influence buyer perception and support digital ads by reinforcing brand recall. For general best practices and suggested item lists, see industry resources such as Xara.
Step 4: design, brokerage compliance, and file preparation
Clear design and an efficient file workflow save time and reduce costly reprints.
- Use your brokerage templates when required and confirm logo usage, colour palettes, fonts, and mandatory disclosures before you send files to print.
- Choose the online design editor for quick, self-serve edits or request in-house graphic design for custom layouts that need careful composition and colour matching. Local shops usually offer both options to match speed or polish, and you can check services at Top Realtor Sign & Print.
- Prepare images at 300 dots per inch at the final print size and export in CMYK colour mode. Supply print-ready PDFs, ideally PDF/X-1a, and include crop marks and a 3 mm bleed for edge-to-edge printing.
- Always request a digital proof and verify all copy, measurements, and contact information. Approve the proof in writing to prevent production delays or charges for remake.
When time is tight, use the online editor to swap photos and edit copy. For brand-sensitive or high-end projects, choose in-house design so files arrive production-ready on the first pass.
Step 5: ordering, turnaround, and local pickup in Mississauga
Follow a short ordering checklist to keep deadlines predictable and to reduce last-minute risk.
- Confirm sizes, materials, finishing options, and quantities before you submit artwork to avoid unexpected changes during proofing.
- Request a proof immediately and approve it by the stated cut-off time to meet rush schedules and same-day production windows.
- Select pickup or delivery. Many local shops offer same-day pickup for business cards and flyers and free delivery above a defined minimum order amount, so confirm thresholds and cut-off times with your supplier such as Top Realtor Sign & Print.
- Expect longer lead times for premium finishes and for large-format items, so schedule these earlier if you need them for a weekend open house.
If you are in Mississauga or the GTA, choose local pickup when possible so you can inspect materials in person and correct any issues before the event.
Step 6: installation, care, and compliance for yard and directional signs

Proper installation extends sign life and avoids fines or complaints.
- Anchor yard signs into soft ground at a slight angle so they face oncoming traffic, and use heavier stakes or frames in wind-prone locations.
- Place directional signs so they do not obstruct sidewalks, sightlines, or driveways, and remove them promptly after the open house or according to your brokerage policy.
- Inspect signs after bad weather for damage, replace bent stakes, and clean graphics before the next event to preserve professional appearance.
- Verify municipal bylaws, condo corporation rules, or heritage restrictions before installing on common property by calling the local municipality or property manager when in doubt.
Step 7: prioritise spend and use Realtor packages
Match your budget to impact using a minimum kit and clear upgrade paths.
- Recommended minimum kit for most listings: one For Sale sign, 50 property flyers, 200 business cards, and basic directional signage for the open house.
- Upgrade to a bundled Realtor package or add luxury finishes when the property price, target market, or branding objectives justify the extra spend. Preconfigured packages simplify ordering and keep branding consistent.
- Print larger quantities for items you will distribute widely; per-unit cost usually decreases as quantity increases.
Using a preconfigured package saves time and ensures consistent branding across materials while keeping ordering straightforward for busy agents. Ask local printers about tiered Realtor packages and same-day options at Top Realtor Sign & Print.
Frequently asked questions
What should I order same day when a listing goes live
Prioritise business cards, a single For Sale sign, and single-page property flyers because these items cover immediate visibility and lead capture. Confirm same-day service availability with your local printer to ensure they can produce and release pickup on the same business day.
How do I ensure my signs and flyers follow brokerage branding rules
Obtain your brokerage brand guidelines and any required logo files before designing. If approvals are required, submit proofs to your brokerage marketing or compliance contact early and keep a record of approval emails or written signoffs. Use brokerage templates if they are available to avoid rework.
Which file formats and image resolutions are required for print-ready files
Supply print-ready PDFs or high-resolution TIFF or JPEG files at 300 dpi at final print size and in CMYK colour mode. Include a 3 mm bleed for full-bleed printing and export to PDF/X-1a when possible. If you are unsure, request assistance from the printer’s in-house design team.
Can I get same-day pickup in Mississauga and which items qualify
Many local printers offer same-day pickup for business cards and flyers and can rush other items depending on schedule and proof approval. Confirm cut-off times and eligible products with the print shop; Top Realtor Sign & Print lists same-day pickup options and local pickup policies on their site.
When are premium finishes like foil or raised UV worth the extra cost
Premium finishes are most effective on business cards and high-end brochures where tactile quality and perceived value matter. Use these finishes selectively for listings with buyers who expect premium presentation or when you want to strengthen your brand differentiation, but allow extra production time.
Where to order and a one-step next action
For same-day jobs, proofs, or package quotes call or visit Top Realtor Sign & Print to request same-day pickup and Realtor packages. Ask for a proof and confirm the cut-off time for rush production so you can collect materials before your event.